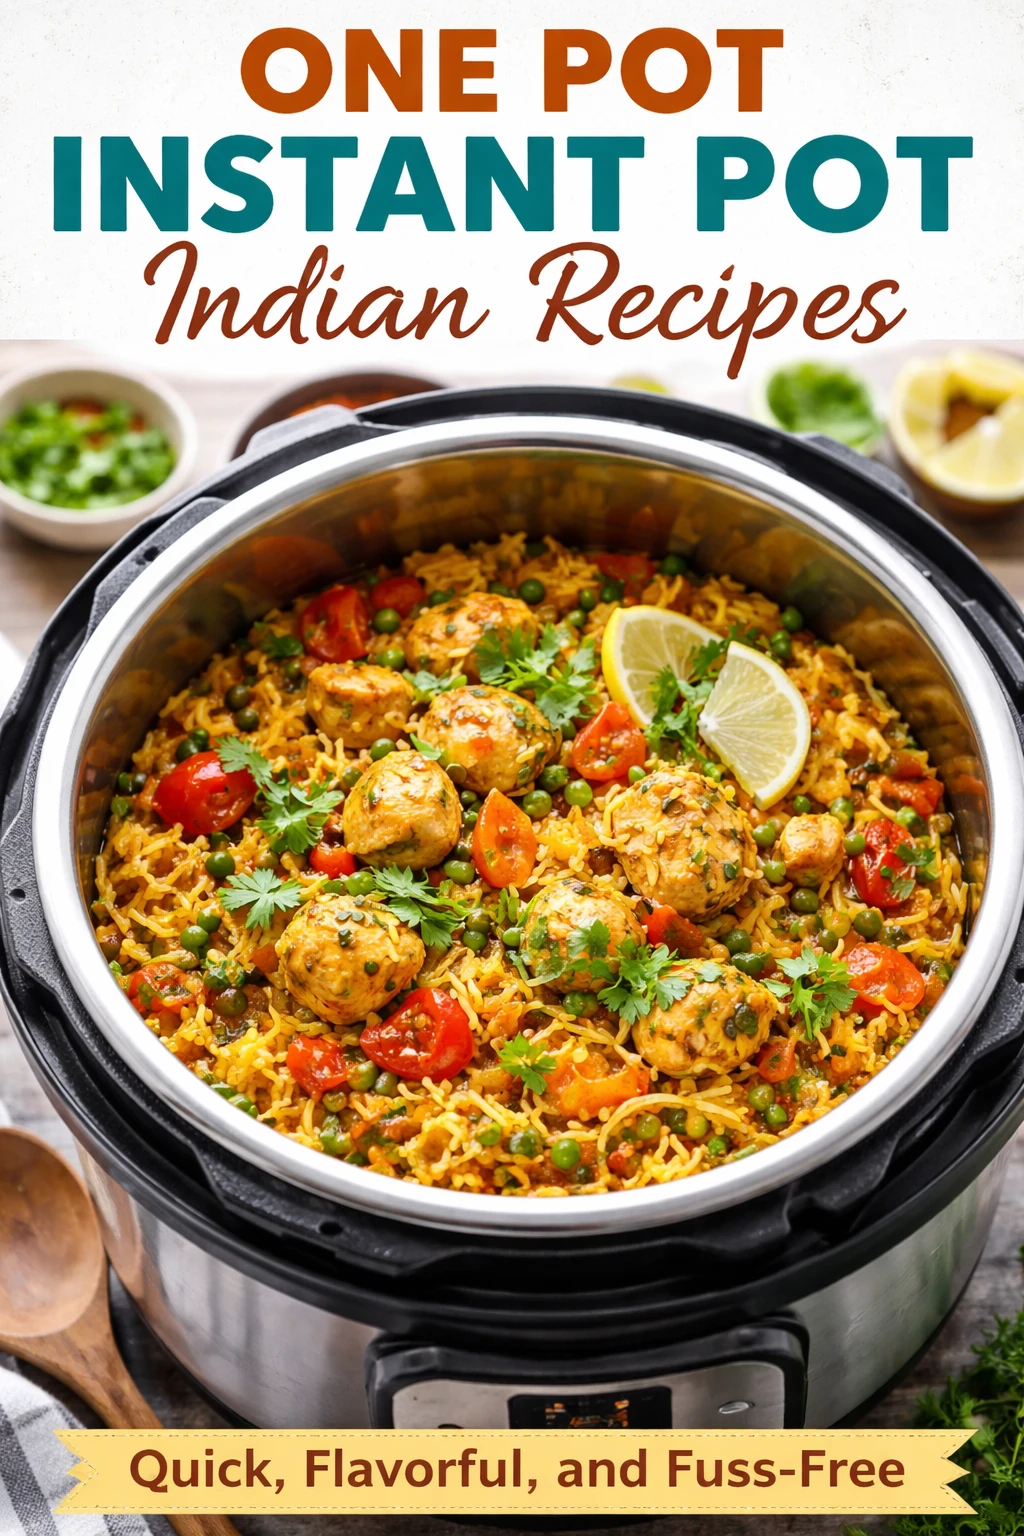
This vibrant Indian curry is a lifesaver on busy nights. Loaded with fresh veggies and warming spices, it’s made entirely in the Instant Pot for fast, fuss-free cooking. Great for cozy dinners or meal prep!
Introduction
I stumbled upon this one-pot Indian curry recipe when I was craving all those rich, warming spices but didn’t want to spend hours prepping or cleaning up a dozen pots. My first attempt was a bit too watery because I rushed the rice soaking step, but after tweaking the water ratio and letting the rice soak for 20 minutes, the texture came out perfectly fluffy and the curry thickened just right. What I love about this version is how everything cooks together in the Instant Pot — the veggies get tender, the spices infuse beautifully, and the rice soaks up all those flavors without any extra fuss. Plus, it’s super easy to customize with whatever veggies you have on hand. The finished dish is vibrant, comforting, and just the right balance of spicy and savory. It’s become my go-to for busy weeknights when I want something wholesome and satisfying without spending all evening in the kitchen.
How To Do It
Step 1
Start by setting your Instant Pot to the sauté function and heating the vegetable oil. Once hot, add the finely chopped onion and cook, stirring occasionally, until it becomes translucent and starts to brown slightly around the edges—this usually takes about 5-7 minutes. This step is crucial because caramelizing the onion develops a deep, sweet flavor base that really elevates the curry. Avoid rushing by stirring too frequently, as you want the onion to soften and brown gently without burning.
⏱ Time: 7 minutes
✓ Doneness: Onions are golden and soft, with a sweet aroma filling the kitchen.
Step 2
Add the minced garlic and grated ginger to the onions, stirring constantly for about 1 minute until fragrant. Then sprinkle in the ground cumin, coriander, turmeric, garam masala, and red chili powder. Toast the spices with the aromatics for 1-2 minutes, stirring often to prevent burning. This step blooms the spices, releasing essential oils that add depth and complexity to the curry. Don’t skip to add raw spices directly to liquid; toasting them first makes a big flavor difference.
⏱ Time: 3 minutes
✓ Doneness: The mixture releases a rich, warm, and fragrant spice scent.
Step 3
Pour in the canned diced tomatoes and stir everything together, scraping any browned bits off the bottom of the pot. Let the tomato mixture simmer for about 5 minutes on sauté mode. This softens the tomatoes and melds their acidity with the spices, creating a luscious curry base. Keep an eye to prevent sticking or burning, stirring occasionally.
⏱ Time: 5 minutes
✓ Doneness: Tomato sauce thickens slightly and deepens in color.
Step 4
While the tomato base simmers, rinse the basmati rice under cold water until the water runs clear to remove excess starch. This prevents the rice from becoming gummy. Then soak the rice in cold water for 20 minutes. Soaking helps the grains absorb water evenly, resulting in fluffier, separate rice after cooking. Don’t skip this step if you want perfect texture.
⏱ Time: 20 minutes (can overlap with previous step)
✓ Doneness: Rice grains look slightly swollen and water is mostly clear.
Step 5
Drain the soaked rice and add it to the Instant Pot along with the cauliflower florets, diced carrots, green beans, frozen peas, and 2 1/4 cups water. Stir gently to combine, making sure rice is evenly distributed and submerged. Season with salt to taste. This layering ensures the rice cooks evenly with the vegetables, soaking up all the curry flavors while steaming perfectly.
⏱ Time: 5 minutes
✓ Doneness: Ingredients are combined uniformly with no dry patches.
Step 6
Secure the Instant Pot lid and set the valve to sealing. Select the 'Manual' or 'Pressure Cook' setting on high pressure and set the timer for 6 minutes. Pressure cooking speeds up the cooking process while locking in flavors and moisture. Resist the urge to open the pot early; letting the pressure naturally release preserves the texture and prevents the rice from being mushy.
⏱ Time: 6 minutes cooking + 10 minutes natural release
✓ Doneness: Instant Pot beeps and pressure naturally releases before opening.
Step 7
Once the pressure has naturally released, carefully open the lid. Gently fluff the rice and vegetables with a fork to separate the grains and mix the curry evenly. This helps the steam escape and prevents clumping. Avoid stirring vigorously as it can break the rice grains and turn the texture mushy.
⏱ Time: 2 minutes
✓ Doneness: Rice is fluffy and vegetables are tender but intact.
Step 8
Taste the curry and adjust seasoning with extra salt or a squeeze of fresh lemon juice if desired. Fresh cilantro chopped on top adds a bright, herbal finish that complements the spices beautifully. Adding fresh herbs at the end preserves their flavor and color, making the dish look as good as it tastes.
⏱ Time: 3 minutes
✓ Doneness: Bright green cilantro contrasts with the rich curry.
Step 9
Serve the curry hot, ideally with warm naan or a side of yogurt to balance the spices. This dish also stores well as leftovers and can be enjoyed the next day for an even deeper flavor. Enjoying it fresh is best, but reheating gently with a splash of water or broth keeps it moist.
⏱ Time: Immediate serving
✓ Doneness: Dish is steaming and aromatic, ready to eat.
Variations
Chicken and Pea Curry
Add 1 pound of boneless, skinless chicken thighs cut into bite-sized pieces with the vegetables before pressure cooking. The chicken cooks tender and soaks up the spices, making the dish heartier. Omit peas if preferred. Expect a richer, protein-packed meal.
Note: Increase cooking time to 8 minutes and ensure natural release to fully cook chicken without drying.
Creamy Coconut Curry
Stir in 1 cup of canned coconut milk after pressure cooking and simmer on sauté for 5 minutes to thicken slightly. This adds a luscious creaminess that balances the spices and adds tropical flavor. Great for a milder, richer curry.
Note: Add coconut milk after pressure cooking to prevent curdling and maintain smooth texture.
Spicy Lentil and Vegetable Curry
Add 1 cup of red lentils with the rice and vegetables for extra protein and fiber. Increase water to 3 cups and cook for 8 minutes under pressure. The lentils soften and thicken the curry, creating a hearty stew-like consistency.
Note: Rinse lentils well and adjust water carefully to avoid over-thickening or dryness.
Vegan Chickpea Curry
Replace vegetables with 1 can of drained chickpeas and diced sweet potatoes. Cook with rice and spices as usual for a filling vegan option. The sweet potatoes add natural sweetness that pairs well with the spices.
Note: Increase water slightly to 2 1/2 cups and check tenderness after pressure cooking.
Mixed Vegetable Medley
Use whatever seasonal veggies you have: bell peppers, zucchini, spinach, or eggplant. Chop uniformly for even cooking. This variation lets you customize flavors and textures based on availability and preference.
Note: Adjust cooking time slightly if using very soft or dense vegetables to avoid over- or undercooking.
Pro Tips
Don’t skip soaking the rice before cooking.
Soaking allows the rice grains to absorb water evenly, resulting in fluffier, less sticky rice. Without soaking, the rice can cook unevenly under pressure, leading to clumps or mushy texture. This step is especially important in pressure cooking where precise moisture balance is key.
Toast your spices in the oil before adding liquids.
Toasting spices releases their essential oils, which intensifies their flavor and aroma. Adding raw spices directly to liquids doesn’t allow this oil release, resulting in a blander dish. The gentle heat in oil also mellows the spices, reducing any harsh or bitter notes.
Use the natural pressure release instead of quick release.
Natural release lets the pressure drop gradually, which finishes cooking the rice and vegetables gently. Quick release can shock the ingredients, causing uneven cooking or mushiness. It also helps the flavors meld better as the pot slowly depressurizes.
Caramelize onions slowly over medium heat.
Slow caramelization develops sweet, complex flavors through Maillard reactions without burning. High heat can burn onions quickly, creating bitterness. Stirring occasionally and being patient ensures a deep flavor base essential for a rich curry.
Use fresh ginger and garlic for best flavor.
Fresh aromatics provide bright, sharp notes that ground powders can’t replicate. They infuse the curry with vibrant flavor and aroma. Using pre-minced or powdered versions often results in duller, less complex taste.
Adjust the chili powder to your heat preference.
Red chili powder varies in heat level, so start with less and add more if desired. This control prevents overwhelming the dish with spice and keeps it balanced. You can also add a pinch of sugar if the heat feels too sharp.
Finish with fresh cilantro just before serving.
Adding cilantro at the end preserves its fresh, bright flavor and vibrant color. Cooking cilantro can dull its taste and turn it dark green or brown. A fresh garnish adds a lovely contrast to the warm spices.
Common Mistakes to Avoid
Not rinsing or soaking the rice
Why it happens Many cooks skip rinsing or soaking to save time, assuming it won’t affect the texture much.
Fix Always rinse rice under cold water until clear to remove surface starch, then soak for at least 20 minutes. This prevents clumping and ensures fluffy, separate grains after cooking.
Adding spices directly to liquid without toasting
Why it happens Some assume adding spices to the sauce is easier and faster than sautéing.
Fix Toast spices in oil with aromatics before adding liquids. This unlocks their full flavor potential and creates a more fragrant, balanced curry.
Using quick pressure release instead of natural release
Why it happens Impatience or lack of knowledge about pressure cooking leads to quick release.
Fix Allow the Instant Pot to naturally release pressure for 10 minutes after cooking. This lets the rice and veggies finish cooking gently and prevents mushy texture.
Skipping caramelizing the onions
Why it happens Some think raw onions are fine or want to save time.
Fix Take the time to cook onions until golden brown. This step builds a sweet, flavorful base essential to the curry’s depth.
Overfilling the Instant Pot
Why it happens Trying to make a larger batch without adjusting liquid ratios.
Fix Stick to recommended ingredient amounts. Overfilling can cause uneven cooking and safety issues with pressure release.
Nutrition
Per Serving:
Nutritional values are estimates and may vary based on specific ingredients used.
Storage & Tips
Room Temperature
This curry can safely sit covered at room temperature for up to two hours. Beyond that, bacteria growth increases, so refrigerate promptly. Cover with a lid or plastic wrap to keep it moist and prevent contamination.
Refrigerator
Store leftovers in an airtight container for up to 4 days. The flavors deepen overnight but the rice may firm up and dry slightly. Reheat gently with a splash of water or broth to restore moisture. Avoid overheating to prevent mushiness.
Freezer
Freeze in airtight, freezer-safe containers for up to 3 months. To prevent freezer burn, cool completely before freezing and remove as much air as possible. Thaw overnight in the refrigerator before reheating.
Reheating
Reheat on the stovetop over low-medium heat with a splash of water or broth to loosen the curry. Stir occasionally until warmed through. Microwave reheating works too but cover and stir halfway to ensure even heating. Avoid high heat to prevent drying out.
Make Ahead
You can prepare the spice base and chop vegetables 1-2 days ahead and store separately in the fridge. Soak the rice just before cooking. Assemble and cook everything fresh the day of serving for best texture and flavor.
FAQ
Can I use other types of rice for this recipe?
While you can try other long-grain rice varieties, basmati is preferred for its distinct aroma and fluffy texture. Short-grain or jasmine rice may become sticky or mushy under pressure. If using a different rice, adjust water and cooking time accordingly and soak it if possible.
What if I don’t have an Instant Pot?
You can make this curry on the stovetop in a heavy-bottomed pot. Sauté the onions and spices, add veggies, rice, and water, then cover and simmer on low heat until rice is cooked and vegetables are tender, about 25-30 minutes. Stir occasionally and adjust liquid as needed.
How spicy is this curry?
The recipe is moderately spicy due to the red chili powder, but you can adjust the amount to your taste. For a milder version, reduce or omit the chili powder and increase garam masala for flavor without heat.
Can I add meat or tofu to this dish?
Yes! Adding chicken, lamb, or tofu works great. For meat, cut into bite-sized pieces and cook under pressure for an extra 2-3 minutes. For tofu, add it after cooking to prevent it from breaking apart. Adjust liquid slightly when adding proteins.
Why does the curry sometimes turn out watery?
Watery curry usually results from too much liquid or not cooking long enough to reduce the sauce. Make sure to measure water accurately and allow natural pressure release. You can also use the sauté function after cooking to simmer off excess liquid if needed.
What’s the best way to store leftovers?
Cool the curry completely before transferring to airtight containers. Store in the fridge for up to 4 days or freeze for up to 3 months. Reheat gently with a splash of water to restore texture and moisture.
Can I prepare this recipe for meal prep?
Absolutely! This curry keeps well in the fridge and tastes great reheated. Portion into containers for easy grab-and-go lunches or dinners. Just add fresh cilantro after reheating for brightness.
What if I don’t like one of the vegetables?
Feel free to swap or omit vegetables based on your preference or what you have on hand. Just keep the total volume similar so cooking times and liquid ratios stay balanced.
Final Thoughts
Give this one-pot Instant Pot Indian curry a try — I promise it’ll become your weeknight favorite! Let me know how your version turns out and any twists you add.