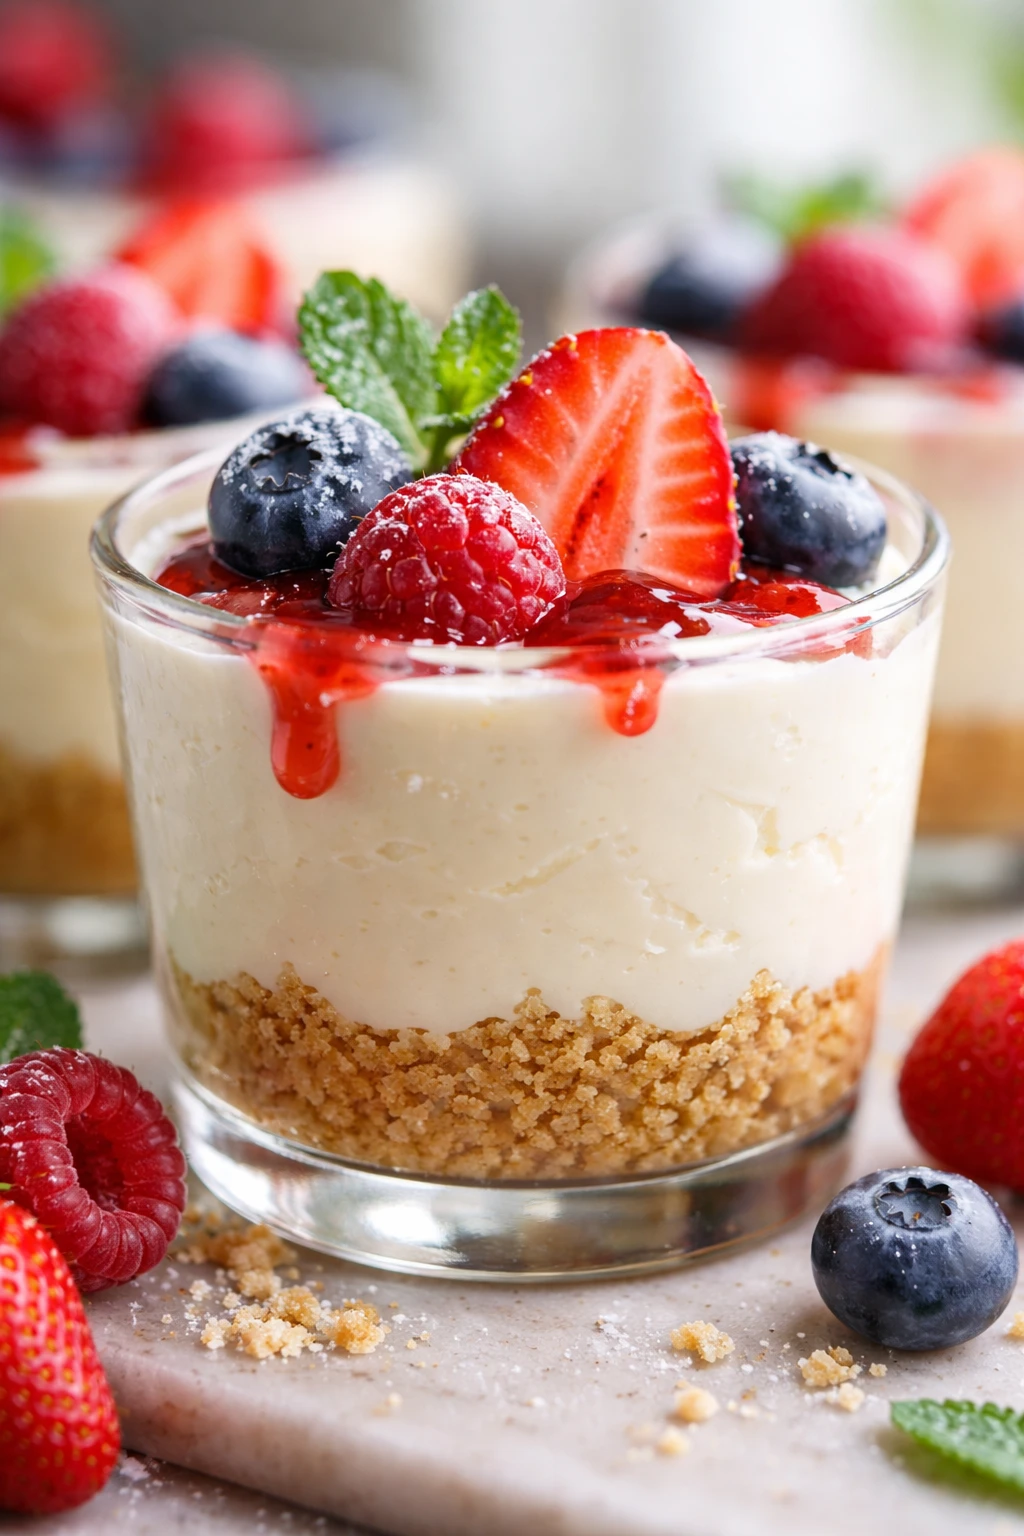
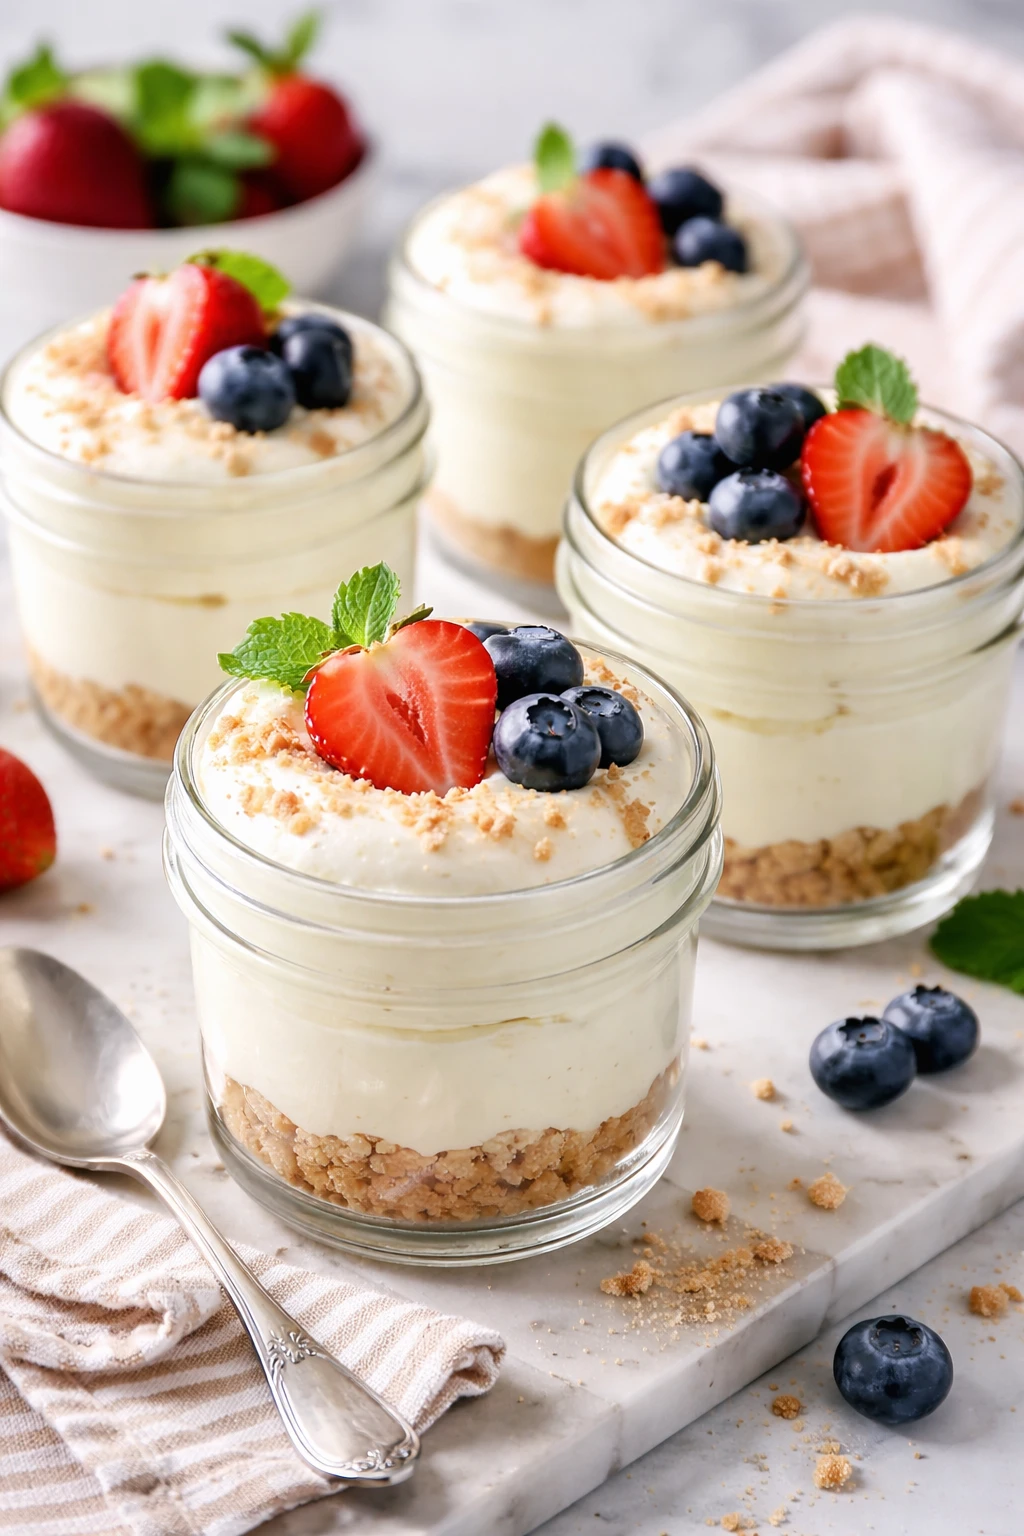
These no bake cheesecake cups are my go-to when I want something creamy and quick. The trick is folding whipped cream into cream cheese to keep it light and fluffy. Perfect for any time you need a sweet fix!
Introduction
I first stumbled upon this no bake cheesecake cups recipe on a hectic weeknight when I desperately wanted something sweet but didn’t want to heat up the oven. What I love about this version is how incredibly creamy it is without feeling heavy or dense. The magic lies in folding whipped cream gently into the cream cheese mixture, which gives it that airy, mousse-like texture that’s just irresistible. I’ve tried other no bake cheesecakes before, but they often end up too dense or overly sweet. This one strikes the perfect balance every time. Plus, it’s super quick to whip up — just 15 minutes and you’re done! I usually make the crust from crushed graham crackers mixed with melted butter, which adds a lovely crunch and a classic cheesecake flavor. Topped with fresh berries, it’s the perfect dessert to impress guests or just treat yourself after a long day. Honestly, it’s become a staple in my recipe box because it feels special but is so easy to make. The first time I shared it with friends, they couldn’t believe it was no bake! I think you’ll love how light and creamy these cups turn out, and they’re great for any occasion — from casual snacks to dinner parties.
How To Do It
Step 1
Start by preparing the crust. Combine the crushed graham crackers with melted butter in a bowl until the mixture looks like wet sand. This step is crucial because the butter acts as a binder, helping the crumbs stick together and form a solid base. If you skip this or don’t mix well, your crust will fall apart when you serve it. Press the mixture firmly into the bottom of your serving cups or ramekins. Use the back of a spoon or your fingers to pack it evenly and tightly. A well-packed crust gives that satisfying crunch that contrasts nicely with the creamy filling.
⏱ Time: 5 minutes
✓ Doneness: Crust feels firm and compact when pressed, no loose crumbs falling off
Step 2
In a mixing bowl, beat the softened cream cheese with sugar and vanilla extract until smooth and creamy. It’s important to use softened cream cheese here because cold cream cheese won’t blend well and can leave lumps. Beat on medium speed until it’s silky and fully combined. This base mixture is the flavor backbone of your cheesecake filling, so getting it smooth ensures a luscious texture later.
⏱ Time: 3-4 minutes
✓ Doneness: Mixture is smooth, no lumps, and slightly glossy
Step 3
In a separate chilled bowl, whip the heavy cream until stiff peaks form. This means when you lift the whisk, the cream holds its shape firmly without collapsing. The cream’s cold temperature helps trap air as you whip, which is essential for that light texture. If you overwhip, it can turn grainy or start turning into butter, so watch carefully and stop at the right moment.
⏱ Time: 5-7 minutes
✓ Doneness: Whipped cream stands in sharp peaks and looks fluffy and airy
Step 4
Gently fold about a third of the whipped cream into the cream cheese mixture to lighten it. Folding means using a spatula to cut down through the middle and scoop underneath, turning the mixture over without stirring vigorously. This technique keeps the air bubbles intact, which makes the filling fluffy instead of dense. Repeat folding in the remaining whipped cream in two batches until fully combined. Be patient here; overmixing will deflate the cream and make the filling heavy.
⏱ Time: 4 minutes
✓ Doneness: Filling looks smooth, light, and airy with no streaks of cream
Step 5
Spoon the cheesecake filling over the prepared crust in your cups, smoothing the top with the back of a spoon. Fill each cup almost to the top, leaving a little space for toppings if you want. The contrast between the crunchy crust and fluffy filling is what makes this dessert so delightful. Don’t rush this step; even spreading helps with presentation and ensures every bite has the perfect balance.
⏱ Time: 3 minutes
✓ Doneness: Filling sits evenly on crust, surface is smooth and neat
Step 6
Cover the cups with plastic wrap or lids and chill in the refrigerator for at least 2 hours, preferably longer. This chilling step is essential because it allows the filling to set and the flavors to meld. If you skip chilling, the texture will be too soft and won’t hold up well when served. Longer chilling also intensifies the cream cheese flavor and improves the overall mouthfeel.
⏱ Time: 2 hours minimum
✓ Doneness: Filling is firm to the touch but still creamy, not runny
Step 7
Before serving, add fresh berries or fruit on top for a pop of color and freshness. You can also drizzle a little honey or sprinkle crushed nuts if you like. These toppings add texture and balance the richness of the cheesecake filling. I love how the tartness of berries contrasts with the sweet, creamy base.
⏱ Time: 2 minutes
✓ Doneness: Toppings look fresh and vibrant, enhancing presentation
Step 8
Serve chilled straight from the fridge. These cheesecake cups are best enjoyed cold to keep their delicate texture intact. If left out too long, the filling softens and can lose its shape. So plan to serve them soon after removing from the fridge for the best experience.
⏱ Time: Immediate serving
✓ Doneness: Filling holds shape on spoon, texture is creamy and smooth
Step 9
Store any leftovers in airtight containers in the refrigerator for up to 3 days. The texture might firm up a bit more, but they still taste delicious. Avoid freezing as the whipped cream can separate and create an icy texture. When ready to eat, let them sit at room temperature for 10 minutes for the best flavor and texture.
⏱ Time: Storage step
✓ Doneness: Leftovers remain creamy and fresh-smelling when stored properly
Variations
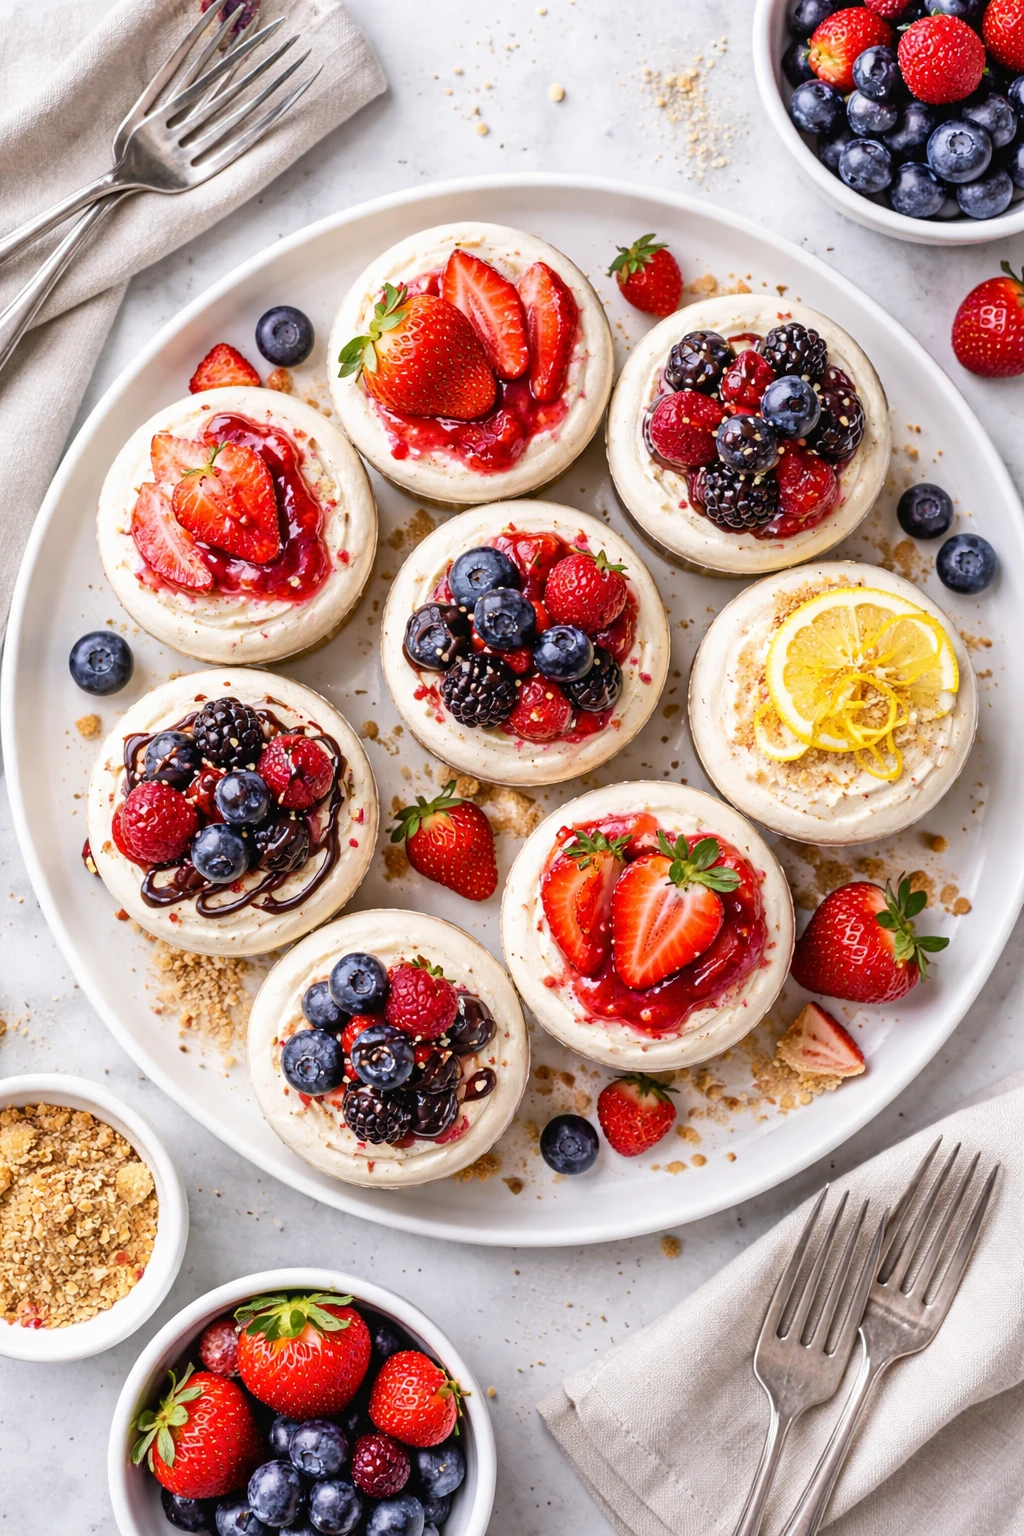
Lemon No Bake Cheesecake Cups
Add 2 tablespoons of fresh lemon juice and a teaspoon of lemon zest to the cream cheese mixture before folding in the whipped cream. This gives a bright, tangy twist that’s refreshing and perfect for spring or summer. Top with candied lemon peel for extra zing.
Note: Because lemon juice is acidic, add it gradually to avoid curdling. Fold gently to keep texture light.
Chocolate Swirl No Bake Cheesecake Cups
Melt 2 ounces of dark chocolate and swirl it gently into the cream cheese mixture before folding in whipped cream. This creates a marbled look and adds rich chocolate flavor without overpowering the cheesecake’s tang.
Note: Ensure chocolate is cooled slightly before folding to prevent melting whipped cream.
Berry Compote Topped Cheesecake Cups
Prepare a quick berry compote by simmering mixed berries with a bit of sugar and lemon juice until thickened. Spoon this over the chilled cheesecake cups for a fruity, saucy topping that complements the creamy filling beautifully.
Note: Cool compote completely before topping to avoid melting the filling.
Nutty Crust No Bake Cheesecake Cups
Swap half the graham crackers in the crust for finely chopped toasted nuts like pecans or almonds. This adds a crunchy, nutty flavor and a more complex texture to the base, making it extra special.
Note: Toast nuts lightly to enhance flavor but avoid burning, which creates bitterness.
Pumpkin Spice No Bake Cheesecake Cups
Mix in 1/2 cup pumpkin puree and 1 teaspoon pumpkin pie spice into the cream cheese mixture before folding in whipped cream. This variation is perfect for fall, offering warm spices and seasonal flavor without baking.
Note: Pumpkin puree adds moisture; slightly reduce heavy cream to maintain filling consistency.
Pro Tips
Always soften your cream cheese to room temperature before mixing.
Softened cream cheese blends smoothly with sugar and vanilla, preventing lumps and ensuring a creamy texture. Cold cream cheese resists mixing, resulting in uneven filling and a less pleasant mouthfeel.
Chill your mixing bowl and beaters before whipping the cream.
Cold equipment helps the cream whip faster and hold its shape better by stabilizing fat molecules. Warmer tools lead to slower whipping and a risk of overwhipping or separating.
Fold the whipped cream gently into the cream cheese mixture instead of stirring.
Folding preserves the air bubbles whipped into the cream. Stirring vigorously deflates the mixture, making the filling dense and heavy rather than light and fluffy.
Press the crust firmly into the cups to form a compact base.
A tightly packed crust holds together well when eating and contrasts nicely with the creamy filling. Loose crumbs will fall apart and make the dessert messy.
Chill the assembled cheesecake cups for at least 2 hours before serving.
Chilling allows the filling to set and flavors to meld. Without adequate chilling, the filling will be too soft and runny, lacking the signature cheesecake texture.
Use fresh fruit toppings just before serving to keep them vibrant.
Adding fruit too early can cause them to release moisture, making the crust soggy and the topping look less appealing. Fresh fruit adds color and a fresh-tart contrast to the rich filling.
Avoid freezing the cheesecake cups to preserve texture.
Freezing can cause the whipped cream and cream cheese to separate upon thawing, resulting in a grainy texture. It’s best to store leftovers in the fridge and consume within a few days.
Common Mistakes to Avoid
Using cold cream cheese without softening
Why it happens Many assume cream cheese can be mixed straight from the fridge, but cold cream cheese resists mixing and creates lumps.
Fix Let the cream cheese sit at room temperature for 30-60 minutes before mixing. If short on time, microwave in 10-second bursts, stirring in between until smooth.
Overwhipping the cream
Why it happens It’s easy to get carried away whipping cream, thinking more is better for volume.
Fix Stop whipping as soon as stiff peaks form. If you overwhip, the cream will separate into butter and liquid, ruining the texture. Start over with fresh cream if needed.
Mixing whipped cream too vigorously into cream cheese
Why it happens Some think thorough stirring is needed to combine ingredients evenly.
Fix Use a gentle folding motion with a spatula to preserve air bubbles. This keeps the filling light and fluffy rather than dense.
Not pressing the crust firmly
Why it happens Rushing or ignoring this step leads to a crumbly, unstable base.
Fix Use the back of a spoon or your fingers to pack the crust tightly into the cups. This creates a solid foundation for the filling.
Skipping chilling time
Why it happens Impatience or last-minute plans might tempt skipping refrigeration.
Fix Plan ahead to chill at least 2 hours. Chilling firms the filling and enhances flavor. Without it, the dessert is runny and less enjoyable.
Nutrition
Per Serving:
Nutritional values are estimates and may vary based on specific ingredients used.
Storage & Tips
Room Temperature
These cheesecake cups should not be left out at room temperature for more than 2 hours. Keep them covered to prevent drying out or absorbing odors. Ideal to serve immediately after removing from the fridge.
Refrigerator
Store in airtight containers or cover tightly with plastic wrap in the refrigerator for up to 3 days. The texture may firm up slightly but remains creamy. Best served chilled; let sit 5-10 minutes at room temperature before eating for optimal flavor.
Freezer
Freezing is not recommended as the whipped cream and cream cheese tend to separate and become grainy after thawing. If necessary, freeze in airtight containers for up to 1 month and thaw overnight in the fridge, but texture may be compromised.
Reheating
Do not reheat. These cheesecake cups are meant to be enjoyed cold. If too firm from refrigeration, let sit at room temperature for 10-15 minutes before serving to soften slightly.
Make Ahead
Prepare the crust and filling up to 1 day in advance. Assemble the cups and refrigerate overnight to allow flavors to meld and filling to set fully. Add fresh fruit toppings just before serving to keep them vibrant.
FAQ
Can I use low-fat cream cheese for this recipe?
You can, but keep in mind that low-fat cream cheese contains more water and less fat, which can make the filling less creamy and more watery. For best texture and flavor, full-fat cream cheese is recommended.
What can I substitute for graham crackers in the crust?
You can use digestive biscuits, vanilla wafers, or even crushed pretzels for a salty-sweet twist. Just make sure to crush them finely and mix with melted butter to hold the crust together.
How long can I store these cheesecake cups in the fridge?
They keep well in an airtight container for up to 3 days. After that, the texture and flavor start to deteriorate. Always keep them chilled until ready to serve.
Can I make this recipe vegan or dairy-free?
This recipe relies heavily on cream cheese and heavy cream for texture and flavor. To make it vegan, you’d need suitable dairy-free cream cheese and coconut cream alternatives, but the texture and taste will differ. Experiment with vegan products designed for cheesecake.
What if my whipped cream doesn’t form stiff peaks?
Make sure your cream is very cold and your bowl and beaters are chilled. Use heavy cream with at least 36% fat. If it’s too warm or low-fat, it won’t whip properly. Start again with fresh cold cream if needed.
Why is folding the whipped cream important instead of stirring?
Folding gently incorporates air without deflating the whipped cream. Stirring vigorously breaks down air bubbles, making the filling dense instead of light and fluffy.
Can I add gelatin to firm up the filling?
You can add a small amount of dissolved gelatin if you want a firmer set, especially if you plan to unmold the cheesecake. However, this recipe is designed to set in the fridge without gelatin for a soft, creamy texture.
Is it okay to use store-bought whipped cream instead of whipping my own?
Store-bought whipped cream often contains stabilizers and is less airy, which can affect the texture. For best results, whip your own heavy cream to stiff peaks.
Final Thoughts
I hope you give these no bake cheesecake cups a try — they’re a simple way to enjoy creamy, dreamy dessert anytime. Don’t forget to share how yours turn out!