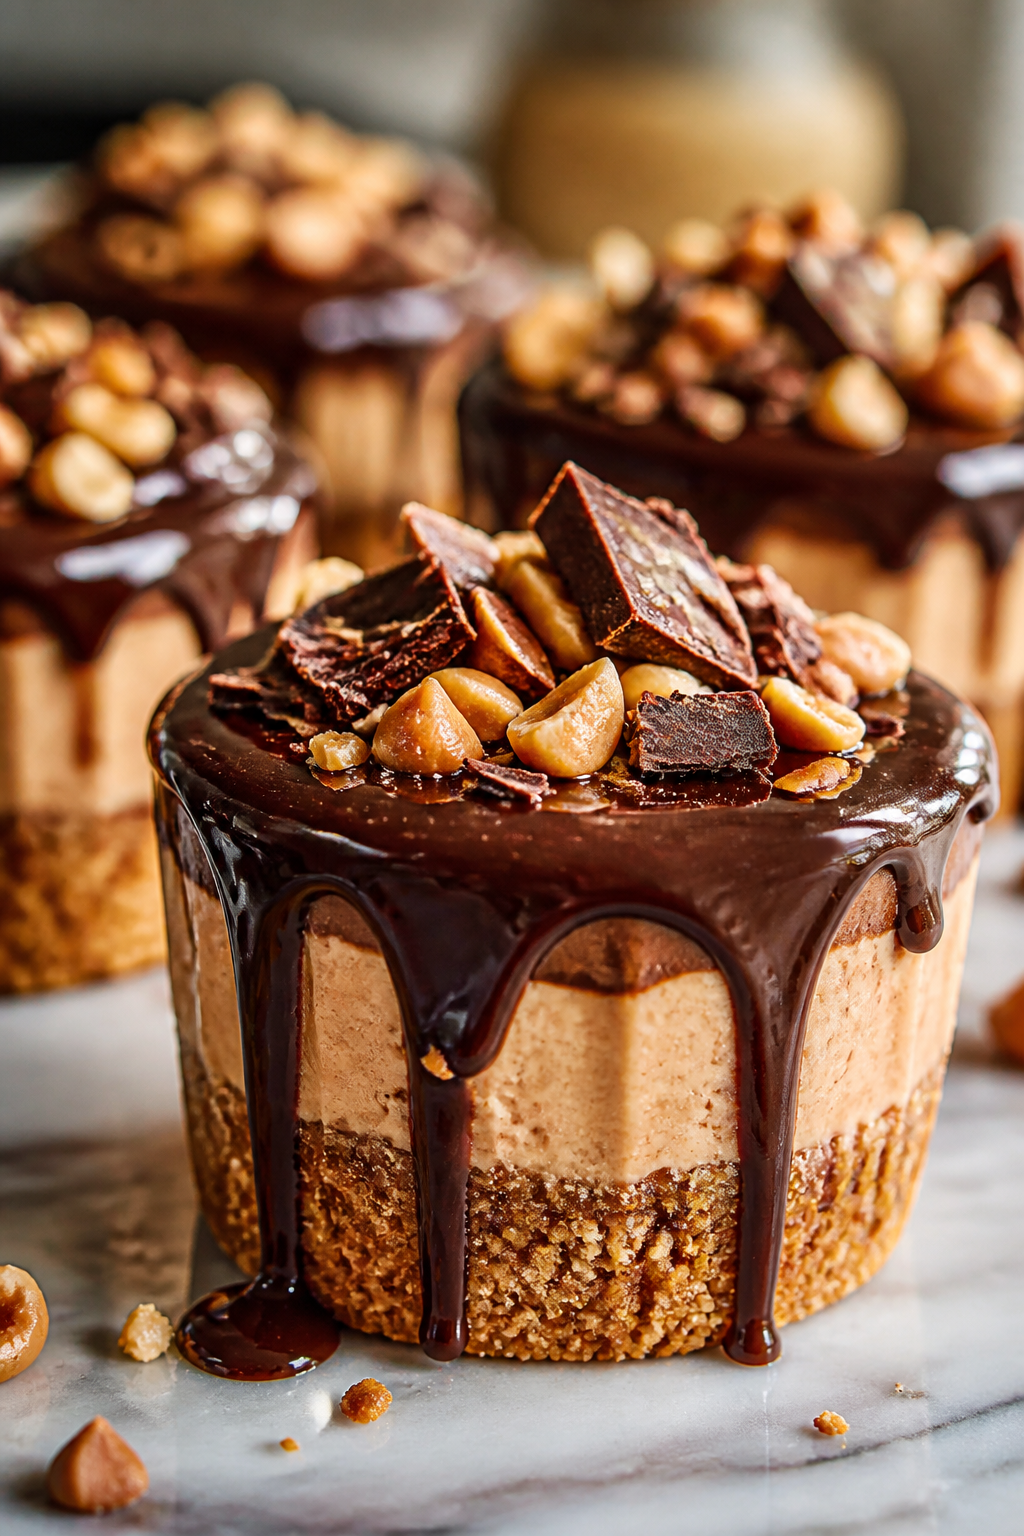
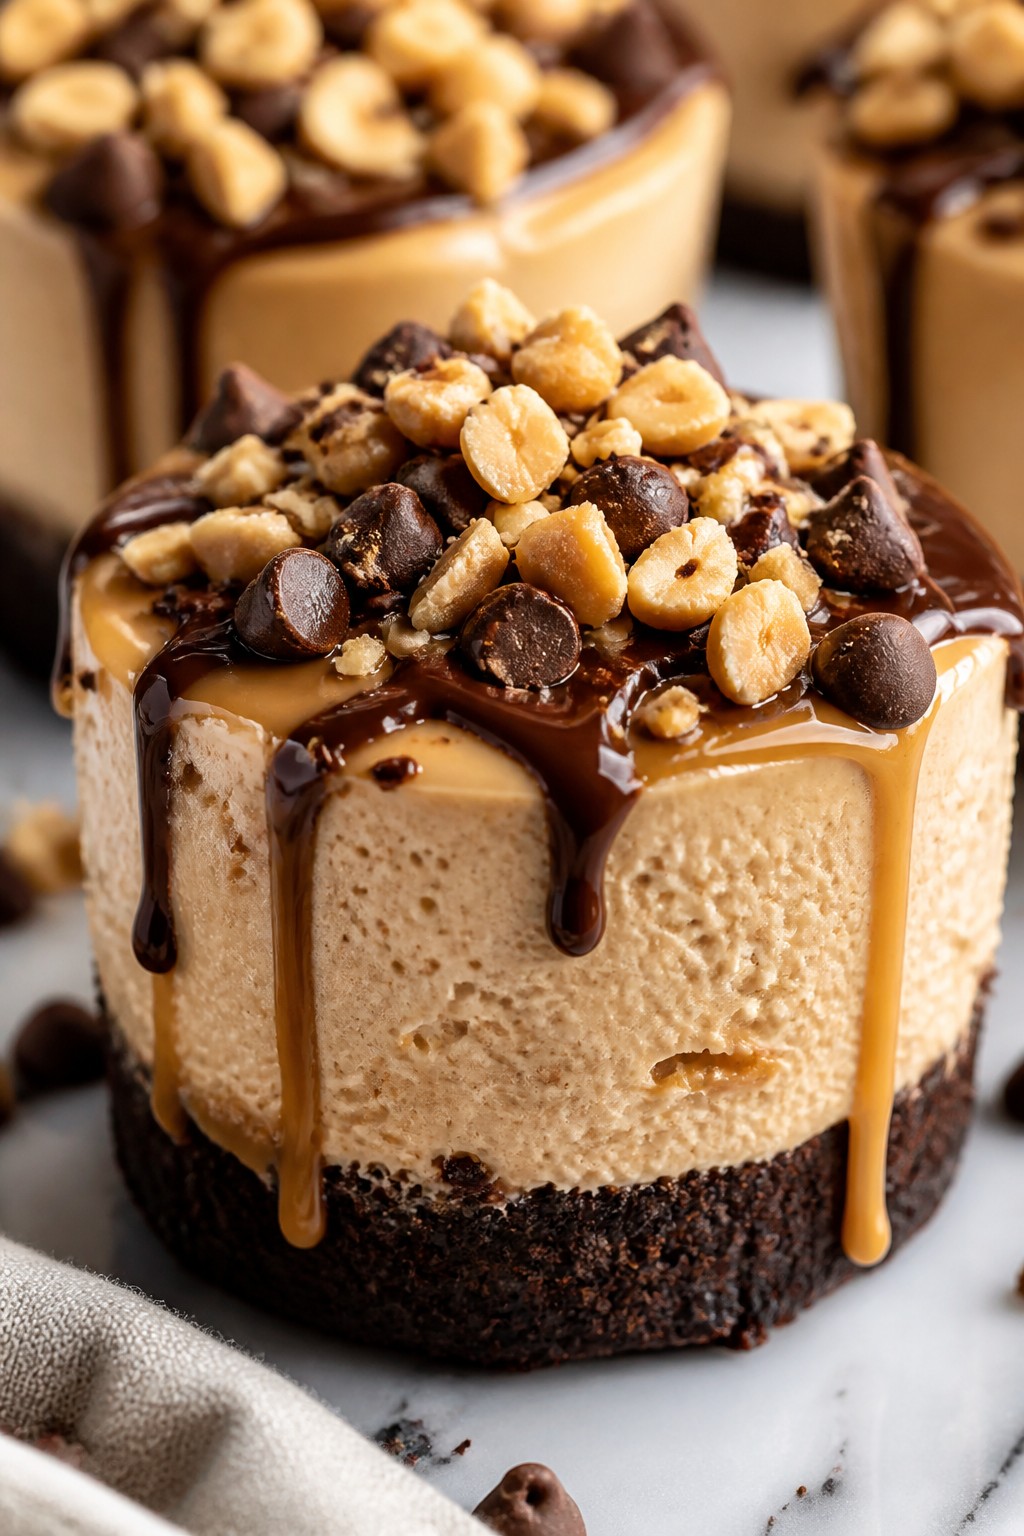
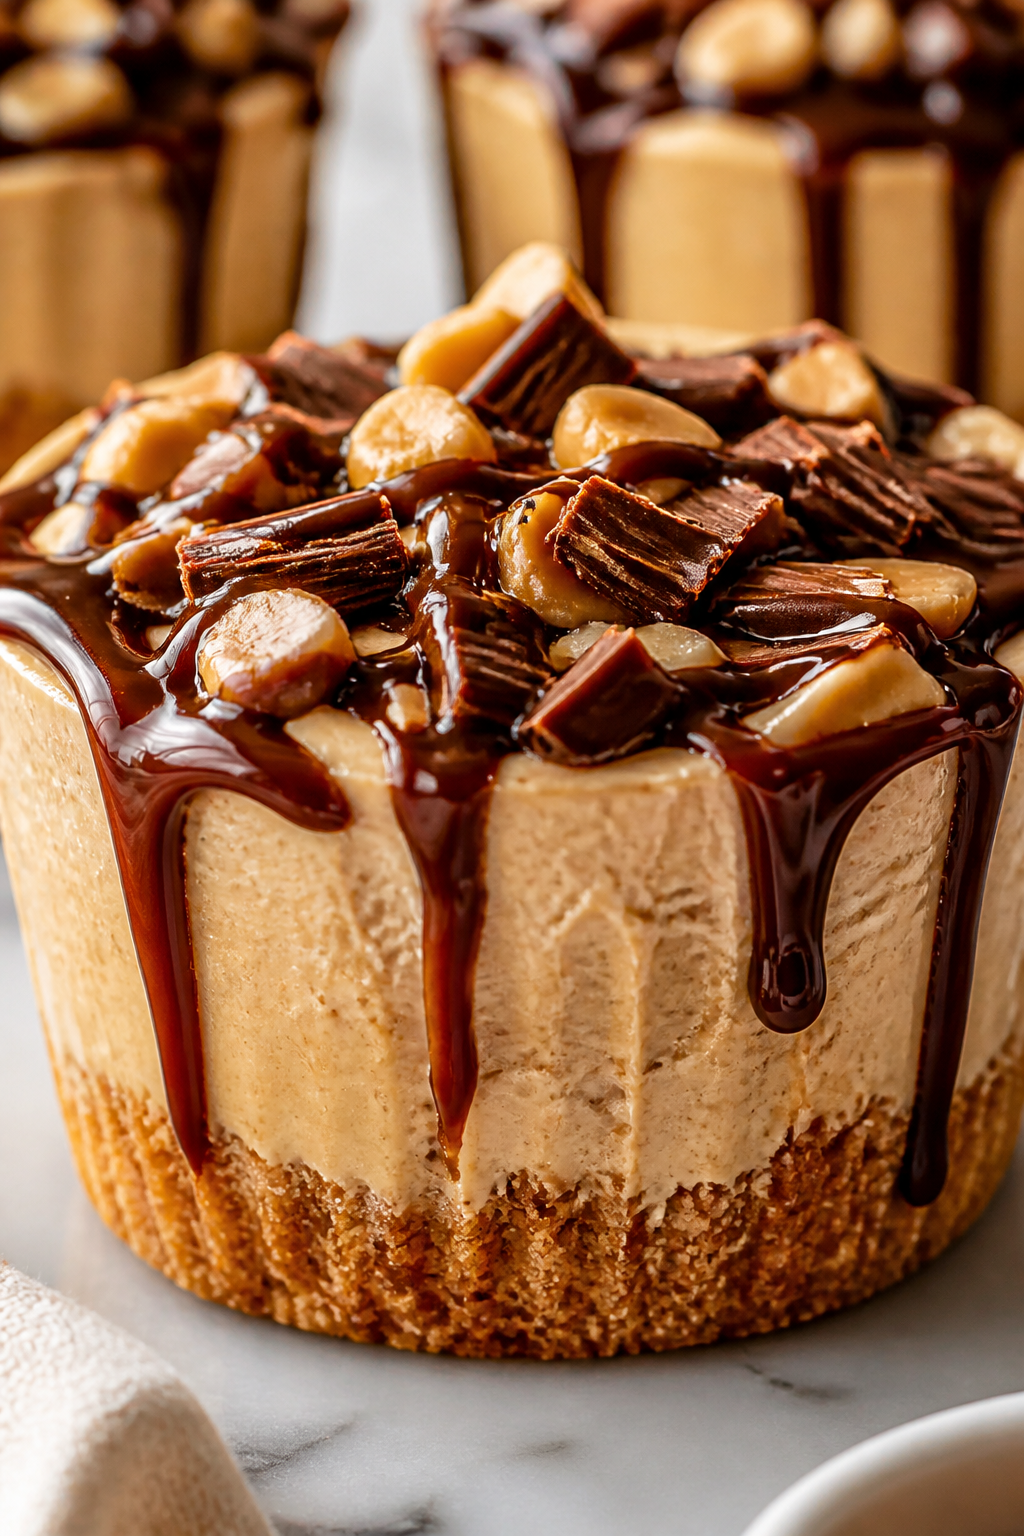
These no bake cheesecake cups blend rich chocolate and peanut butter into a silky, creamy treat. The secret is chilling, not baking, which keeps them super smooth. Great for last-minute desserts or when you want something indulgent but easy!
Introduction
I stumbled upon this no bake cheesecake cups recipe when I needed an easy dessert that wouldn’t heat up the kitchen. Honestly, I've tried plenty of no bake cheesecakes before, but they often ended up too dense or grainy. What makes this one stand out is the balance of peanut butter and chocolate folded gently into whipped cream and cream cheese — it’s like a cloud of flavor in every bite. The trick I learned was melting the chocolate just enough to swirl it in without making the mixture too runny, keeping the texture silky and smooth. I love serving these chilled in individual cups; it feels special but it’s so simple. It’s perfect for those times when you want something indulgent but fuss-free, whether it’s a casual family dinner or a last-minute party. The creamy texture with a slight crunch from the graham cracker crust and peanuts is just pure joy. Plus, no oven means less stress for me, which makes dessert even sweeter!
What You'll Need
Approximately 6 cups, 6 servings
- 1 1/2 cups graham cracker crumbs
- 6 tablespoons unsalted butter, melted
- 8 ounces cream cheese, softened
- 1/2 cup creamy peanut butter
- 1 cup powdered sugar
- 1 teaspoon vanilla extract
- 1 cup heavy cream, cold
- 1/2 cup semi-sweet chocolate chips, melted and slightly cooled
- 1/4 cup chopped peanuts, for garnish (optional)
How To Do It
Step 1
Start by mixing the graham cracker crumbs with the melted butter in a bowl until the crumbs are evenly coated and slightly damp. This step is crucial because the butter binds the crumbs together, forming a solid crust base. Press this mixture firmly into the bottom of your serving cups or a small pan to create an even layer. Avoid pressing too hard or the crust will be too dense, but make sure it’s compact enough to hold when you add the filling. This crust sets the foundation for texture contrast in your dessert.
⏱ Time: 10
✓ Doneness: The crust should hold its shape firmly when pressed with your finger but not feel hard or dry.
Step 2
In a large mixing bowl, beat the softened cream cheese and peanut butter together until smooth and creamy. This ensures the filling is silky without lumps. Then add the powdered sugar and vanilla extract, mixing until fully incorporated. The powdered sugar sweetens and stabilizes the filling, so don’t skip or reduce it too much, or the texture might be off. Make sure your cream cheese is at room temperature to avoid lumps and achieve a smooth blend.
⏱ Time: 5
✓ Doneness: The mixture should be smooth, creamy, and free of lumps.
Step 3
In a separate chilled bowl, whip the heavy cream with an electric mixer until soft peaks form. The cold temperature helps the cream whip better, giving the filling a fluffy, light texture. Be careful not to overwhip, or the cream might turn grainy or start turning to butter, which would ruin the texture of your cheesecake filling.
⏱ Time: 7
✓ Doneness: Soft peaks should hold their shape but still look silky and smooth.
Step 4
Gently fold the whipped cream into the peanut butter and cream cheese mixture using a spatula. Folding preserves the airiness of the whipped cream, resulting in a light and fluffy texture. Avoid stirring vigorously, which can deflate the mixture and make the cheesecake dense.
⏱ Time: 5
✓ Doneness: Filling should look uniform and fluffy without visible streaks of cream or cheese.
Step 5
Carefully melt the chocolate chips in a microwave-safe bowl in 20-second bursts, stirring in between to prevent burning. Cool slightly so it’s warm but not hot before adding to the filling. This prevents the chocolate from melting the whipped cream and ruining the texture. Swirl the melted chocolate gently into the filling for a marbled effect or mix fully for a chocolaty flavor throughout.
⏱ Time: 5
✓ Doneness: Chocolate should be smooth and warm but not hot, easily swirled without clumping.
Step 6
Spoon or pipe the cheesecake filling over the prepared crust in your cups. Tap gently to remove air bubbles and smooth the top with a spatula. This helps create a neat presentation and a consistent texture. Filling evenly also ensures every bite has the perfect balance of crust and creamy topping.
⏱ Time: 5
✓ Doneness: Surface should be smooth and level, with no large air pockets.
Step 7
Chill the cheesecake cups in the refrigerator for at least 4 hours, or preferably overnight. This chilling step is essential for the filling to set properly and develop that luscious, creamy texture. Rushing this step can result in a runny dessert that doesn’t hold shape well.
⏱ Time: 240
✓ Doneness: Filling should be firm to the touch but still creamy, not liquid.
Step 8
Before serving, sprinkle chopped peanuts on top for a crunchy contrast that complements the creamy filling and rich chocolate flavor. This little extra adds texture and a nutty aroma that makes the dessert feel more special. You can also add a drizzle of melted chocolate or a dollop of whipped cream if you like.
⏱ Time: 5
✓ Doneness: Peanuts should be evenly distributed and fresh, adding a crunchy texture.
Step 9
Serve chilled straight from the fridge. These cheesecake cups are best enjoyed cold to keep the creamy texture intact and the flavors balanced. If left out too long, the filling softens and loses its structure. If you want to prepare ahead, keep them covered tightly in the fridge until ready to serve.
⏱ Time: 0
✓ Doneness: Dessert is cold and firm but melts smoothly in your mouth.
Variations
Berry Swirl No Bake Cheesecake Cups
Add a swirl of fresh berry puree or jam into the filling before chilling. This adds a lovely tart contrast to the rich peanut butter and chocolate and brightens the flavor. Use raspberries or strawberries for best results.
Note: Make sure the berry puree is thick and not too watery to avoid thinning the filling and affecting set.
Salted Caramel No Bake Cheesecake
Drizzle salted caramel sauce over the crust before adding the filling and sprinkle a pinch of flaky sea salt on top before serving. The salty-sweet combo enhances the peanut butter and chocolate flavors beautifully.
Note: Use a thick caramel sauce to prevent it from soaking into the crust and making it soggy.
Vegan No Bake Cheesecake Cups
Replace cream cheese with vegan cream cheese, use coconut cream whipped for the heavy cream, and substitute butter with coconut oil. This version keeps the creamy texture and rich flavor but is dairy-free and perfect for plant-based diets.
Note: Coconut cream must be chilled overnight for best whipping results. Vegan cream cheese texture varies, so blend well.
Crunchy Chocolate Hazelnut No Bake Cheesecake
Swap peanut butter for chocolate hazelnut spread and add chopped toasted hazelnuts on top for a nutty crunch. This variation offers a richer, more decadent flavor profile reminiscent of classic Nutella desserts.
Note: Hazelnut spread is sweeter than peanut butter, so you might want to reduce powdered sugar slightly.
Espresso Infused No Bake Cheesecake
Add a teaspoon of instant espresso powder to the cream cheese mixture for a subtle coffee kick that pairs perfectly with chocolate. It’s a sophisticated twist that coffee lovers will adore.
Note: Dissolve espresso powder in a tablespoon of hot water before mixing to avoid graininess.
Pro Tips
Always soften your cream cheese before mixing.
Cold cream cheese is tough to mix and causes lumps, which ruins the smooth texture of the filling. Softened cream cheese blends easily with peanut butter and sugar, creating a silky base essential for that creamy mouthfeel.
Chill your mixing bowl and beaters before whipping cream.
Cold equipment helps keep the cream cold while whipping, which traps more air and creates stable peaks. Warm bowls or beaters can cause the cream to whip slowly or separate, resulting in a runnier filling.
Melt chocolate slowly in short bursts, stirring often.
Chocolate burns quickly if heated too fast or unevenly. Stirring between bursts distributes heat and prevents scorching, which keeps the chocolate smooth and shiny for folding into the filling without lumps.
Press the crust firmly but not too hard into the cups.
Pressing too lightly results in a crumbly crust that falls apart; pressing too hard makes it dense and hard. A firm but gentle press ensures a compact crust that holds together and offers a pleasant crunch.
Fold whipped cream gently into cream cheese mixture.
Stirring vigorously deflates the whipped cream, losing air that makes the filling light and fluffy. Folding preserves the volume and creates a smooth, airy texture that feels luxurious.
Let the assembled cheesecake cups chill overnight if possible.
Longer chilling allows the filling to set fully and the flavors to develop. It also firms up the texture, making it easier to serve and enhancing the mouthfeel.
Use plastic wrap to cover the cups tightly when chilling.
This prevents the filling from absorbing fridge odors and stops a skin from forming on the surface, keeping your cheesecake cups fresh and creamy.
Common Mistakes to Avoid
Using cold cream cheese directly from the fridge.
Why it happens Many assume cream cheese can be mixed right away for convenience, but cold cream cheese is stiff and lumps easily.
Fix Always take cream cheese out at least 30 minutes before use to soften it. If in a hurry, microwave in 5-second bursts until slightly softened but not melted.
Overwhipping the heavy cream.
Why it happens It’s easy to keep whipping past the soft peak stage, especially if you’re not used to watching the texture closely.
Fix Stop whipping as soon as soft peaks form—when the cream holds shape but still looks silky. If you overwhip, you’ll end up with grainy, butter-like texture which can’t be fixed.
Adding hot melted chocolate directly into the filling.
Why it happens Rushing the cooling step to save time can cause the chocolate to melt the whipped cream, ruining texture.
Fix Let melted chocolate cool to warm (not hot) before folding in. Test by touching the bowl—if it’s too hot to hold comfortably, wait longer.
Not pressing the crust firmly enough.
Why it happens It’s tempting to skip this step or be gentle to avoid breaking cups, but a loose crust crumbles apart when eating.
Fix Use the back of a spoon or flat-bottomed glass to press the crust evenly and firmly, creating a solid base that holds together.
Skipping the chilling time.
Why it happens Impatience or last-minute plans lead to serving the dessert too soon.
Fix Plan ahead and chill at least 4 hours or overnight. This step is essential for texture and flavor development.
Nutrition
Per Serving:
Nutritional values are estimates and may vary based on specific ingredients used.
Storage & Tips
Room Temperature
These cheesecake cups should not be left at room temperature for more than 2 hours as the filling can soften and spoil. Keep them covered to avoid drying out or absorbing odors if kept out briefly.
Refrigerator
Store in an airtight container in the fridge for up to 4 days. The texture remains creamy but firm. Best served cold directly from the fridge. Avoid leaving uncovered to prevent a skin forming on top.
Freezer
Freeze cheesecake cups for up to 1 month. Wrap tightly in plastic wrap and place in a freezer-safe container to prevent freezer burn. Thaw overnight in the fridge before serving. Texture may be slightly less fluffy after freezing but still delicious.
Reheating
No reheating needed. Serve chilled for best texture and flavor. If slightly too firm from fridge, let sit at room temperature for 10-15 minutes before serving.
Make Ahead
Prepare crust and filling separately up to 1-2 days ahead. Assemble cups and chill overnight. This saves time and ensures the filling has ample time to set perfectly.
FAQ
Can I use crunchy peanut butter instead of creamy?
You can, but creamy peanut butter blends more smoothly into the filling and provides a consistent texture. Crunchy peanut butter will add texture but might make the filling less silky and a bit grainy. If you love crunch, try adding chopped peanuts on top instead.
What if I don’t have graham crackers for the crust?
Crushed digestive biscuits or vanilla wafers work well as substitutes. Just crush them finely and mix with melted butter the same way. Avoid cookies with strong flavors like chocolate or spices as they might overpower the cheesecake.
How do I prevent the cheesecake filling from being grainy?
Use full-fat cream cheese and fresh heavy cream to ensure the best texture.
Can I make this recipe gluten-free?
The filling is naturally gluten-free.
How long can I store these cheesecake cups in the fridge?
If you want longer storage, freezing is a good option.
Can I double or triple this recipe for a larger batch?
Make sure to mix the filling well to keep it airy when scaling up.
Is it possible to make this without peanut butter?
Try adding melted white chocolate or fruit puree for flavor.
Why is my crust soggy after chilling?
Using melted butter properly binds the crumbs and prevents sogginess.
Final Thoughts
I hope you give these no bake chocolate peanut butter cheesecake cups a try — they’re one of my favorite easy desserts! Let me know how yours turn out and if you add any fun twists.