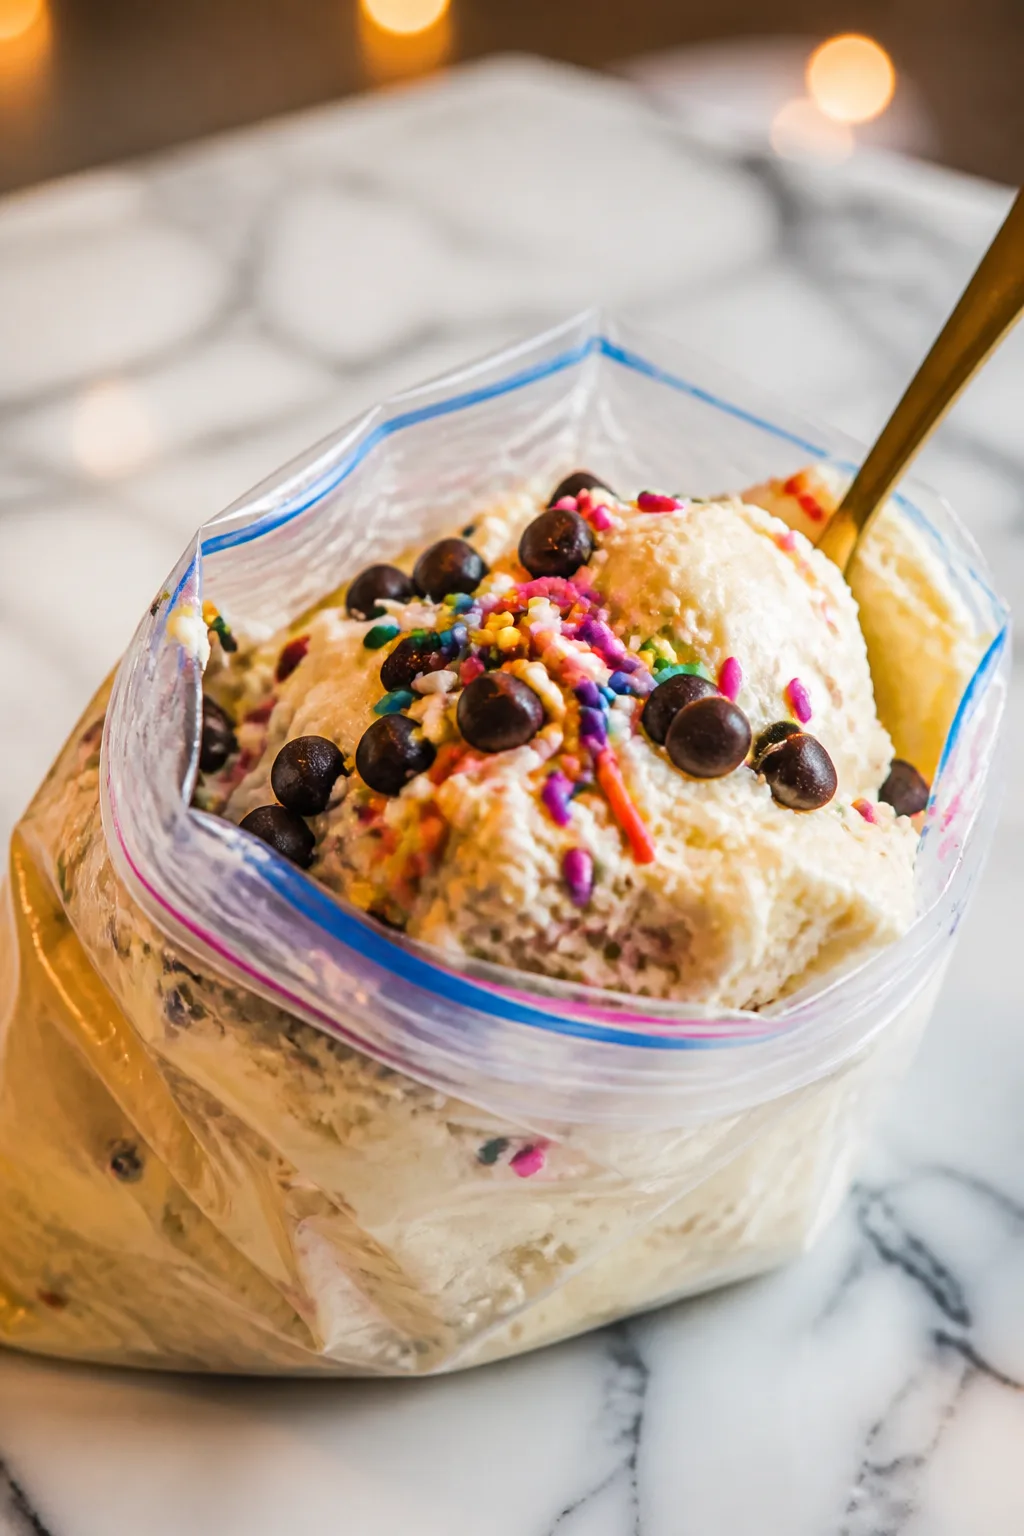
This ice cream in a bag recipe is a fun, hands-on way to whip up creamy ice cream without any fancy machine. Just a few simple ingredients and some shaking make it perfect for warm afternoons or family hangouts.
Introduction
I first stumbled upon this ice cream in a bag recipe years ago during a summer camping trip when we didn’t have an ice cream maker handy. It’s such a simple, hands-on method that instantly became a favorite with my family. What makes this version special is how creamy the ice cream turns out, despite using no machine—just good old-fashioned shaking! I love that kids can get involved, too; it’s a fun activity that ends with a delicious treat. The trick I learned is using rock salt with the ice to lower the freezing point, which helps the mixture freeze faster and creamier. After a few minutes of shaking, you get this rich, smooth ice cream that’s perfect for a hot afternoon or a casual dessert. It’s not just easy, it’s kind of magical, and always brings smiles around the table. Expect a creamy texture with a fresh vanilla flavor that you can customize however you like—add fruit, chocolate chips, or whatever you want. Honestly, it feels like a little homemade celebration every time we make it!
How To Do It
Step 1
Pour the heavy cream, whole milk, sugar, and vanilla extract into the quart-size resealable plastic bag. Seal the bag tightly, making sure there’s no air inside to prevent leaks. This mixture is your ice cream base. Combining these ingredients beforehand ensures the sugar dissolves properly and the flavors blend well, which is key to smooth, creamy ice cream.
⏱ Time: 5
✓ Doneness: Mixture looks evenly combined and sugar mostly dissolved
Step 2
Fill the gallon-size resealable plastic bag halfway with ice cubes, then add the rock salt over the ice. The salt lowers the freezing point of the ice, which helps the ice cream mixture freeze faster and more evenly. This step is crucial because without salt, the ice alone won’t get cold enough to turn the cream into ice cream.
⏱ Time: 5
✓ Doneness: Ice looks frosty and salted well distributed
Step 3
Place the sealed quart-size bag with the ice cream mixture inside the larger bag filled with ice and salt. Seal the large bag tightly to avoid leaks. Keeping the bags sealed prevents salty water from mixing with the ice cream base, which would ruin the flavor and texture.
⏱ Time: 2
✓ Doneness: Both bags tightly sealed with no air pockets
Step 4
Shake the bags vigorously for about 10 to 15 minutes. You can wear oven mitts or wrap the bags in a kitchen towel to protect your hands from the cold. The shaking action churns the mixture, incorporating air and encouraging ice crystals to form, which is how the mixture turns creamy rather than icy. Don’t rush this step—consistent shaking is what makes the ice cream texture just right.
⏱ Time: 15
✓ Doneness: Mixture inside the smaller bag thickens and solidifies to ice cream consistency
Step 5
Carefully remove the smaller bag from the ice mixture and wipe the salt water off before opening. This prevents any salt from getting into your ice cream. Open the bag and check the texture; if it’s too soft, you can seal it again and place it in the freezer for a few minutes to firm up more.
⏱ Time: 3
✓ Doneness: Ice cream has a firm yet scoopable texture
Step 6
Scoop the ice cream into bowls or cones and serve immediately. If you want to add mix-ins like chocolate chips or fruit, fold them in gently after shaking. Serving right away gives you the best creamy texture and fresh flavor.
⏱ Time: 2
✓ Doneness: Ice cream holds shape when scooped
Step 7
If you have leftovers, transfer the ice cream to an airtight container and freeze for up to 2 days. Homemade ice cream can harden more than store-bought, so let it sit at room temperature for a few minutes before scooping again.
⏱ Time: 5
✓ Doneness: Ice cream stored properly without freezer burn
Step 8
For a fun twist, try adding cocoa powder or instant coffee granules to the base before shaking to create chocolate or mocha flavors. Mix thoroughly to avoid clumps. This customization lets you experiment and find your favorite flavor combo.
⏱ Time: 3
✓ Doneness: Flavor evenly incorporated into the base mixture
Step 9
Clean up by recycling or reusing the plastic bags if possible, and wipe down your workspace. Keeping things tidy makes the whole process more enjoyable and ready for your next batch!
⏱ Time: 5
✓ Doneness: Kitchen is clean and bags disposed of properly
Variations
Chocolate Ice Cream Variation
Add 2 tablespoons of unsweetened cocoa powder to the cream and milk mixture before sealing the bag. Mix well to avoid clumps. This gives you a rich chocolate ice cream that’s just as creamy and fun to make.
Note: Make sure to sift the cocoa powder or whisk vigorously to prevent lumps in the base.
Strawberry Swirl Ice Cream
Fold in 1/3 cup of fresh strawberry puree or jam after shaking but before serving. This adds a fresh fruity twist and pretty pink swirls without affecting the freezing process.
Note: Add the puree gently to avoid breaking the ice cream’s texture.
Coffee Flavored Ice Cream
Dissolve 1 tablespoon of instant coffee granules in the cream and milk mixture for a subtle mocha flavor. This variation is perfect for coffee lovers wanting a quick homemade treat.
Note: Ensure coffee granules are fully dissolved to avoid gritty texture.
Vegan Coconut Ice Cream
Swap heavy cream and milk for 1 cup full-fat canned coconut milk and 1 cup coconut water. Use maple syrup instead of sugar. The result is a creamy, dairy-free ice cream with a tropical twist.
Note: Coconut milk tends to freeze harder; shake a bit longer and serve slightly softened.
Mint Chocolate Chip
Add 1/2 teaspoon peppermint extract to the base and fold in 1/4 cup mini chocolate chips after shaking. This classic combo is refreshing and super easy to make at home.
Note: Use peppermint extract sparingly as it’s very strong and can overpower the ice cream.
Pro Tips
Use fresh, cold ingredients straight from the fridge.
Starting with cold cream and milk helps the mixture chill faster when shaken with ice, speeding up freezing and improving texture. Warm ingredients take longer to freeze and can lead to icy or uneven results.
Seal your bags tightly with no air inside.
Air pockets can cause leaks or allow salty water to mix with your ice cream base, ruining the texture and flavor. Press out excess air before sealing to keep everything contained and safe.
Wear gloves or use a towel when shaking.
The ice and salt mixture gets very cold and can be uncomfortable or even cause mild frostbite with prolonged contact. Protect your hands so you can shake vigorously without pain for best results.
Shake consistently for the full time without breaks.
Continuous agitation prevents large ice crystals from forming and incorporates air, creating smooth, creamy ice cream. Stopping early or shaking unevenly leads to icy, hard textures.
Use rock salt instead of table salt when possible.
Rock salt dissolves slower and creates a more stable, colder ice bath. Table salt works but can melt the ice too fast, making the temperature less consistent and slowing freezing.
Add mix-ins after shaking is complete.
Adding ingredients like chocolate chips or fruit during shaking can damage the bags and interfere with freezing. Fold them in gently at the end to keep the texture intact.
If ice cream is too soft, freeze it briefly before serving.
Homemade ice cream made this way can be softer than store-bought. A short stint in the freezer firms it up without losing creaminess, making scooping easier.
Common Mistakes to Avoid
Not sealing the bags properly.
Why it happens It’s easy to rush this step or forget to press out air, leading to leaks or salty water mixing with the ice cream. This often happens when multitasking or not paying close attention.
Fix Take your time to press out all air and seal the bags twice if needed. Test for leaks before shaking by gently squeezing the bags. Using high-quality resealable bags also helps prevent breaks.
Using warm or room temperature ingredients.
Why it happens Sometimes people don’t realize starting cold is important and use ingredients straight from the cupboard or just a bit chilled, which delays freezing.
Fix Always use heavy cream and milk cold from the fridge, ideally chilled for several hours. This ensures faster freezing and better texture.
Stopping shaking too soon.
Why it happens Shaking can be tiring or boring, so it’s tempting to stop early. But insufficient agitation means your ice cream won’t develop the right texture.
Fix Set a timer for 10-15 minutes and keep shaking steadily. Use gloves or towels to protect your hands and make it easier.
Salt water mixing with ice cream base.
Why it happens If bags aren’t sealed properly or have tiny holes, salty water can leak in and ruin the taste and texture.
Fix Check bag seals carefully, wipe off salt water before opening, and use double bags if needed for extra protection.
Using the wrong type of salt.
Why it happens People sometimes grab table salt instead of rock salt, not knowing it affects freezing efficiency.
Fix Use rock salt or kosher salt to create the coldest ice bath. If only table salt is available, use a bit less to avoid melting ice too fast.
Nutrition
Per Serving:
Nutritional values are estimates and may vary based on specific ingredients used.
Storage & Tips
Room Temperature
Homemade ice cream should not be left at room temperature for more than 15-20 minutes to avoid melting and bacterial growth. Keep it covered with plastic wrap or in a container if serving outdoors.
Refrigerator
Store leftover ice cream in an airtight container in the freezer, not the fridge, to maintain texture. Refrigeration will melt the ice cream and ruin the texture quickly.
Freezer
Freeze homemade ice cream in a tightly sealed container for up to 2 weeks. To prevent freezer burn, press plastic wrap directly on the surface before sealing the lid. Thaw slightly at room temperature for 5-10 minutes before scooping.
Reheating
Ice cream is best served cold and does not require reheating. If too hard, let it sit at room temperature for a few minutes to soften before serving. Avoid microwaving as it melts unevenly.
Make Ahead
You can prepare the ice cream base up to a day ahead and keep it refrigerated. Shake and freeze on the day you plan to serve for the best texture and flavor.
FAQ
Can I use regular table salt instead of rock salt?
You can, but rock salt is preferred because it dissolves more slowly and creates a colder ice bath. Table salt melts the ice too quickly, which can make freezing less efficient and result in icier texture.
What if my ice cream is too soft after shaking?
If it’s too soft, place the sealed bag in the freezer for 10-15 minutes to firm up. Homemade ice cream made this way tends to be softer than store-bought, so a quick chill helps achieve scoopable texture.
How do I prevent salt water from leaking into the ice cream?
Make sure the bags are sealed tightly with no holes. Double bagging can help. Also, wipe off salt water from the outer bag before opening the inner bag to keep salt out of the ice cream.
Can I add mix-ins like nuts or chocolate chips during shaking?
It’s best to add mix-ins after shaking to avoid damaging the bags and to keep the texture smooth. Fold them gently into the ice cream after it’s formed.
How long does homemade ice cream last in the freezer?
For best taste and texture, consume within 2 weeks. After that, it may develop freezer burn or ice crystals that affect quality.
Is it possible to make this recipe dairy-free?
Yes! Substitute heavy cream and milk with full-fat coconut milk or other plant-based milks. Keep in mind texture and freezing times may vary slightly.
Why do I need to shake for so long?
Shaking incorporates air and breaks up ice crystals, which is essential for creamy texture. Stopping early results in icy, dense ice cream.
Can I use this method to make other frozen desserts?
Absolutely! You can experiment with sorbets, frozen yogurts, or custards by adjusting ingredients but keeping the shaking and ice salt method the same.
Final Thoughts
Give this ice cream in a bag recipe a try and enjoy a fun, delicious homemade treat. I’d love to hear how yours turns out!